
12x12 light colored cardstock, acrylix stamps with blocks, ink colors.
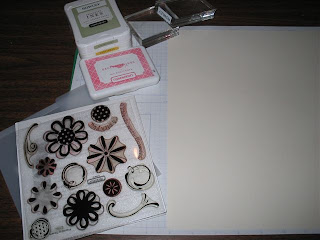
Initial Stamping
Choose your largest image and begin by stamping in one corner but not too close to the edge. Stamp that same image again about 1 1/2 times the size of the stamp away from the the first image. For example, the flower is about 2 inches so I stamped the second flower about 3 inches away.

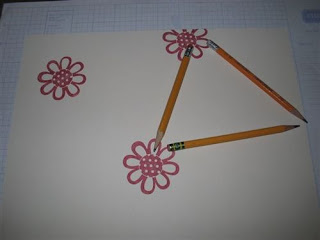
Creating a triangle with the images
An important part of this technique is to create equilateral triangles between your images. I have put pencils down to show how I am using the two stamped images to then visualize the third point of my traingle. That is where I will stamp the next image.

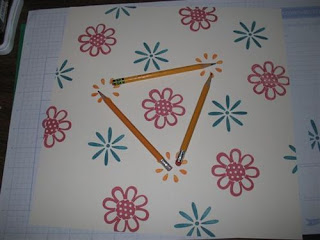
Continue filling page
Using the same dimensions and triangle idea, continue to fill the page with the initial stamp image. At times, your triangle point will fall on the edge of the paper. It is ok to stamp on the edge of the paper with part of the image off the edge. This creates a continuous feeling and is visually pleasing.
Adding a second image
After you have completed stamping and "filling" the page with the first image, choose the next image that is smaller than the first but larger than the others you will use and begin the same technique. Stamp an image, then approximately 1 1/2 times the size of the image distance, stamp your second image. Visualize where the triangle point will be and stamp your third image. I have used the pencils to help with the visualization.

Adding a third image.
Continuing to graduate down in size, use the triangle technique to add a third image.
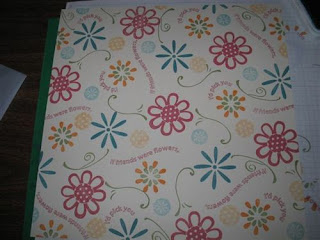
Final stage
Once the page is "filled" with your images, you can then add some detail images to fill in the white spaces. Again you will want to follow the triangle technique but you will not be able to be as "accurate".

Adding details
Here I am adding centers to the gold flower as well as sentiments between the flowers. I am trying to follow the triangle technique to keep the random stamping visually pleasing but I am also trying to "fill in" some of the white space.

More details
Take it slow and easy as you add the details. You don't want to over crowd your page and if you are cutting it up for card making or scrapbooking, you can "fill in" any white spaces that are created by cutting apart the whole.

Finished page
I have added second generation small flowers/icons to continue to fill the white space but not dominate the randomness or colors.
i think this idea is SO cool!! ~R~
ReplyDelete